Showing posts with label Mods. Show all posts

Saturday, November 16, 2013

My Ginz Sissy Bar!

Well, the adventure of the Ginz Sissy Bar started in October.  Well, actually in August because that is when I saw them on the forum, and got interested in them.  however they were $$$... I knew i wanted a tall one.  a big reason for the bar was to be able to get the back pack off my back. two reasons for the backpack off my back was (1) for comfort, and (2) because I wear vests and jackets with artwork on them, and with the back pack, the artwork was not visible.  So.. the sissy bar hunt began, it had to have class.  Blue J is a classy lady.  We all have ideas of the looks we like.  I like the look of a tall sissy bar on my chopper.  the one I wanted wasn't cheap and i wanted their extra emblem of the Maltese cross, coz i like that theme on Blue J. Cha-Ching Cha-Ching on that! Then the luggage rack.  Decided to go for the matching, welded on one.  Got it ordered in October and waited - okay not so patiently - to receive it mid November. It got here Tuesday.  I was wrapped up in business til Friday, but started looking at it Friday night.

outta the box:


This photo no guy will recognize... it's INSTRUCTIONS!  LOL, i know the guys throw those out right off the bat. hahaha.


Instead of opening the bar up yet, i opened a bracket, boy is that baby a solid piece of metal. and the chroming is nice! The bracket feels like it weighs over a lb.


So, time to READ the instructions, coz that's how I roll... they shorted me 4 washers, but I've got those laying around the garage,  Reading through I see they call for a 21/64" drill bit.  Yes, for their 5/16" bolts.  I didn't have that bit, was wondering if i could use a 3/8", but unsure if it would be too big.  posted the question on the forum, got a suggestion to use the one they recommend (thanks LesterDiamond!) so ran out to Lowe's and grabbed one up.  Now I needed to see just what was I up against with this drilling??? so out to the garage to pop off the seat and fender...


To take off the seat/fender


These clips come off first - they are out now they are the holes by the foot pegs.  Those are clips where you push in the center and they release.


If you ride solo, don't' forget to pull out this screw... I did, and was wondering for 10 minutes why the fender wasn't popping off. LOL...  Doh!


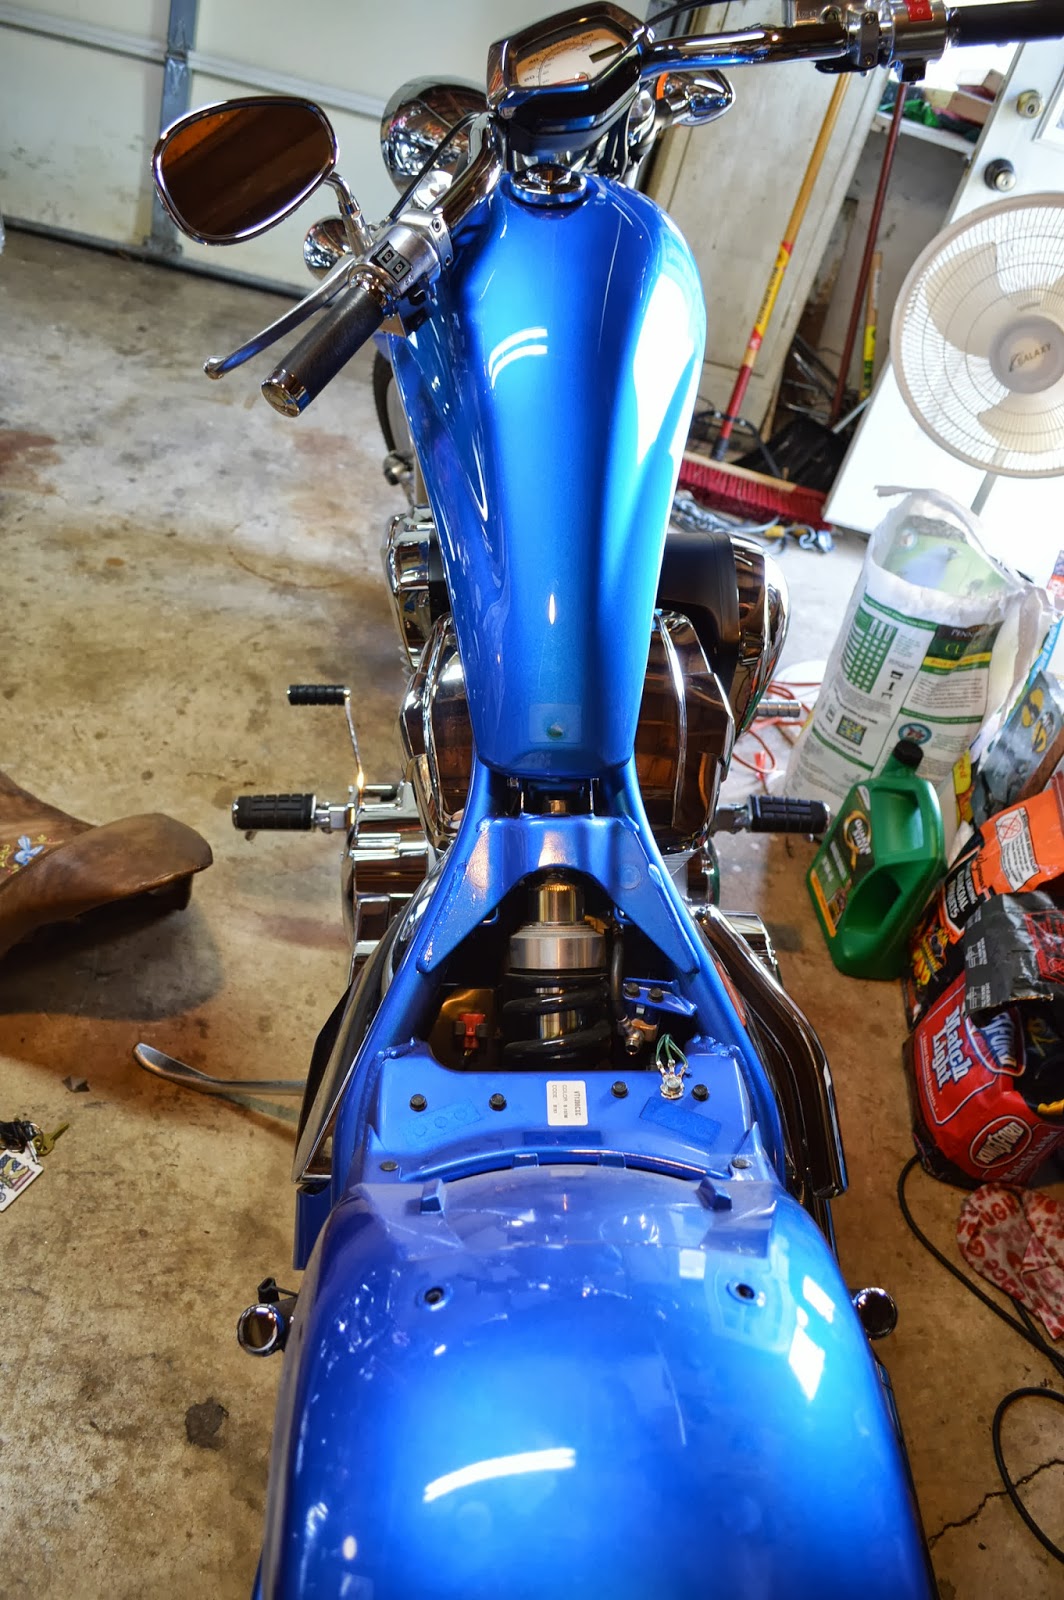
So here we are with the fender off. Looks like I've got some room in there for a FATTER tire!  LOL... yes yes Mod-itis...  all things in their time...


So i took a peek and OMG I am practically stopped in my tracks!  Goodness gracious.  they call that thing the Strut, and goodness it is thick, two layers/hollow and looks so slippery!  plus it's a tiny little area. only 1 " from top to bottom.  Talk about nervous! I became terrified of trying to do this.  How in the world am I going to (1) drill through that metal, (2) drill the holes straight, (3) drill without slipping, (4) not pop a tire.  I'm petrified.  I'm glad I looked at this tonight.  I posted another topic on the forum to seek shared experiences.  I hope peeps respond tonight and the UK/Canada Folks in the wee hours of the US Morning.

Shoot.  Hmmmm... Gotta get me some courage.!

Here's what I'm talking about "thin"


This is the template for the drilling.  OMG.


Well, We'll sleep on this and get back to it in the morning...

Niters, 

JDol.

SATURDAY


Well, we wrote the forum and sought suggestions and support for taking on the adventure of the day I was getting psyched up to get going on the project.  SO we posted and waited, and got so many helpful suggestions/tips.  i decided to get a move on and bring the party out to the garage and set up.

So we need:
Laptop (Check tips)
MacX's Install notes on Forum
Directions
Locktite
Centerpunch
Duct tape
Masking Tape
Drill/Bits
Silicone
Diet Dew
&
Devil Dogs....


So here are a few tips.  Place a piece of duct tape on the strut so the drill bit doesn't wander/slip when you start it (Thanks Allan!).  Use a center punch to have a starting point for drilling (Thanks TheNewAftermath).  Drill pilot holes - Thanks (SinisterTurtle)...1/8"...  Use a corded drill (Thanks ExRed/KIOWA).  I only have a cordless, so it was suggested if the cordless didn't have enough to get the drill bit going, I could step it up to the right size by going up drill bit sizes in increments (Thanks RebelD!)....Slow drill speeds! & use cutting oil/lube. (Thanks SinisterTurtle)  I found a recipe for that which is for 2 parts water, 1 part olive oil and a dash of washing liquid.

So let's begin...


Let get the center punch involved


Drilling I used 3 sizes.  The Ginz bar is SAE. I had to go out and purchase the 21/64" bit for the 5/16" bolts.  I had the other SAE bits already, but didn't realize until i had started that they were less than adequate, being somewhat dull.  I spent about 1 1/2 hours working on drilling the pilot holes on both sides, but i was only able to break through the front of the strut.  It is hollow inside and then I had to drill the back out. that was T-O-U-G-H!  So while I was almost through the back side on this one side, it wasn't going, and I had to take a break...My hand hurt, and I figured I best recharge not only the drill batteries, but JDol's batteries :)


Ate lunch, checked into the forum, and resumed. Then I was cooking with gas - re-energized.  Finished up the Right side rather quickly, moved over to the left, and then the bits i was using went D-U-L-L.... back to Lowe's  :)  I must say i learned a lot about the settings on my drill, those dials at the top labeled 1 through 19, and the high low settings...  Now that I am reflecting, I suppose a corded drill would have made a difference.  I think I will put that on the list of tools to get.

SO... we got all the holes drilled, and hoo-rah they all line up with the brackets.  How's about that? :)  So before we put them on, let's silicone the holes to prevent rusting. (Thanks Ken/MacX/Ginz)


We will also Lock-tite the threads for bolting. (Thanks Ken/Ginz)


So I got both brackets on each side, torqued to 175 in/lb.
Now time to get the baby on - As of yet I haven't even unwrapped it...


the fasteners for the bar, use a large hex, (SAE) so we dug this out of the 1960's bin... lol...


Anyway, we finished up the job and snapped a photo just to commemorate the achievement :)

Hopefully get more pics tomorrow or next week.


I'm exhausted!!!!!!!!!!!!!!!


Cheers!

JDol


Saturday, November 9, 2013

Latest Mod - Radiator Grille Cover

So... It's called Moditis on The Fury Forum.  Hooked on doing mods to your bike... we all have it when we own fury's.  I guess many bikers have it, to make your bike your own; unique - you know how it is.  I think Blue J is coming along nicely now with my latest mod - the Radiator Grille.  I am going with a "Chopper Cross" theme and Blue J theme on the bike, so I've been wanting to get rid of the junky OEM black plastic grille cover that the dealer had hanging on with a plastic tie lol.. and get a nice chrome one. Hadn't found the "perfect" one yet, so many things are skulls out there - quite the popular theme - skulls and flames. not so much for me :)... So, as usual, hanging out on the forum, you find links and such from folks, and that's what I did to this seller on EBay: Ferreus Industries And found an awesome grille cover for the Fury, (which also doesn't have a zillion custom parts out there, BTW.) Just right for me.  They shipped super quick and the grille is awesome.


I pictured with this grille I would then purchase a 4 or 5 inch Maltese Cross to mount onto the grille so I could have my theme. So I found this one (billet, chrome):


From Ebay Seller: Asset Liquidation Co. They shipped fast and this was a great item.

So i spent about 2 hours, (yes I am a novice!) but I installed it all by myself! and I am proud of that.  I am trying to do everything on my bike by myself.  DH (dear hubby) might have to help with some big things, but I really want to be doing these things myself as much as possible.  The cross is mounted with permanent double sided mounting foam tape. The mounting screws did not align properly.  I am already resigned to the fact that i might lose it, if the tape malfunctions at some point, but this is how I have chosen to mount it at this point.  If at a later date I re-think of another plan I will proceed differently.  

So, I think it looks awseome!!! a great addition to the look of Blue J.  


She's really starting to look custom-ized...

I also got the word this week that my Ginz sissy bar was shipped and will be here soon!  I will install soon after, I hope I can do it, cause there's drilling involved and fender removal, and such! Oh boy, I just got okay with getting the seat off :) now I've gotta remove the fender and drill holes?? Oh my.  But I will be proud to be able to do this myself!!!!  I know I can do it with my "Installation Angel" on my side... He was on my side when I installed the radiator grille, when I made the custom seat cover and tank bib... and Oh! did i tell you?  I'm making custom grip covers for the the grips on the handle bars... :) i think they should match the leathers on the seat/bib... still deciding.  Should just take a piece of the leather out there and see what it looks like - then the agony of choosing the design!!! that is the best kind of agony though :)

Hubby is going for a ride in this 27 degree weather!  Me? I gotta go to JA cause my Hat hoop is coming today and I want to test it out, so need some scrap hats to play with.  Fun weekend for me :)

Cheers!!!


JDol


Friday, October 11, 2013

Latest Addition to Blue J...

Well, earlier this week, before I knew I was going to order my GINZ sissy bar, I was suffering from an attack of "moditis" as they call it on The Fury Forum... and i jsut had to get SOMETHING for Blue J, to tie me over until the sissy bar purchase.  Well I had seen this awesome Transmission cover on Sludge's Fury (the MEAN MOOSE) and really loved the look of it.  He had actually painted the letters on his to match his bike paint.  Here's his:


(That's a shot from Toronto)

Anyway, so got the info from him where to get this.  Cannella's Custom Cycles in FL.  Got right on line and ordered it.  The shipped pretty fast and it came today, so I installed it.  It's a plate that goes in the middle of the cover.  Here's mine:


I uploaded my pic to the forum in the "What did you do to your Fury today" thread, and asked for opinions on whether to paint the letters blue to match the Fury.  The chime ins said yes.  Sludge said he painted his with nail polish... sounds good to me. Will look for a similar color to the blue on the bike.

I love this new addition, and will make another post when I paint it.

Cheers for a Friday!

JDol


Wednesday, October 9, 2013

Hip Hip for Mods!

Well today is a great day! You see I've been saving up for the sissy bar that I really want to get.  I want a Ginz Sissy Bar: Old School Extreme.  Actually this picture is the Hell Bent, although not the extreme which is 25" this gives you an idea:


I really like the look of the really tall sissy bar. Kind of fits the chopper look -- you see I'm trying to keep a unique look.  the shorter sissy bars just remind me too much of a regular cruiser.  My sissy bar is for function as well as looks, but actually both equally.  I want to be able to get my backpack off my back and onto a carrier support.  The luggage rack made for the fury: Fury Rack


is a formed rack and not IMHO really a luggage rack, but more of a rear fender bib.  I'm taking a lot of care on mounts, and looks of mounts, etc. I want Blue J to have a distinct look.  The Highway Hawk bars are too low for me here is a sample of the archer: HH Archer Bar . Some of my buddies on the Fury Forum have those and they look real nice, but I wanted a different look. Plus I'm not crazy of the mounts on that bar.  Invicta has one and it looks great:


Because he has a black bike and his mounts are black, so they don't stick out, but chrome on blue would not be a good look to me, if you see the mounting brackets on the Highway Hawk.

So anyway, this is the bar I want to get:


Mine is going to be chrome, Plus I'm not sure which luggage rack to go for either welded on or detachable.  This picture might even be the "extreme" size.  

ANYWAY... AGAIN...

So I'm saving up for this and haven't been buying anything and tossing around maybe I should just get the Highway Hawk cause it's like half the price... lol but I really don't want to sacrifice!  So, by maybe another 3-4 weeks from now I'll be able to get it, right? and guess what? DH comes home and drops a cool hundred on me and tells me to get my sissy bar! Tells me he's donating to my sissy bar fund!  Yippee for me!  Now I'm psyched! Tomorrow I'm ordering for sure!  

Will finish this post tomorrow after I order.

WEDNESDAY


Hoo-Ray!  I got my bar ordered!  The guy Gary at Ginz Choppers was nothing short of fabulous on the phone.  Answered all my questions, and gave me sound advice on what to choose for what I was going for.  I decided on the Hell Bent Extreme, with the Welded-on Hell Bent Luggage rack, plus the Maltese Cross insert (pictured above).  We had discussed whether to go Extreme or Monolith, which is 25" or 30", so he is going to make my 25" Extreme bar an extra 1" just to give a kick up, at no additional charge.  He also bumped my production time up to tomorrow!!!!!!! and send it for chroming Tuesday which takes about a week, and if things go well, he might be able to ship it the following week! He's on West Coast, I'm on East coast, so FedEx is about 4 days. I'm looking at a possible 2 1/2-3 week delivery time...how fabulous is that!!!!!!  I'm real excited. Blue J is going to look so kewl.  Not only i think the sissy bar height is going to be a great look, I'm real glad i added the Maltese Cross Emblem Insert.  That's going to look kewl, too. A nice touch.  It also matches my Tank Bib where i embroidered one on the bib.  I also think i made the right move to get the Hell Bent welded-on luggage rack.  Reasons we discussed, were that to have the luggage rack, if i was going to have it on a lot, it made a better look to have it match the bar; didn't look so "out of place".  The detachable s were good, too, so you could run with just the bar if you wanted to, however my decision rested on the fact that I would be using the rack often and wouldn't care to be taking it on and off, so since it would be on most of the time, I'd rather have the classy matching look, so we went with the welded-on route.

Okee Dokee... That's it for now, gonna go cruise the forum.

Cheers!

JDol


Monday, September 9, 2013

My First Mod - Custom Seat


I joined a Fury Forum and am starting to learn some stuff about Fury's and also meet other Fury owners from around the world.  It seems the big thing about being a Fury owner is making mods  to the Fury's to make them each unique. Some are downright fancy as all get out.  I am making my first mod - re-doing my stock seat.  I am making a custom cover embroidered with her name "Blue J" and a design.  Here is the prototype. it looks good on the bike, i laid the design on my seat to give an idea what it might look like.


I may or may not leave the date on it, not sure yet. but I really like the material, the design, and the name, how that all came out.  I ordered an OEM seat, so I could work on it in spare time.  I am going to install a gel pad to make it more comfortable. A Pro Pad Gel Insert from the Pro Pad company.  They have Cushions and Inserts.  I'm trying the Medium Insert.  I am going to follow This Tutorial I do not know how to load the video into my post here.

Okay all my parts are here. Let's begin...  We need to make the cover, insert the ProPad, and assemble it.  First We'll need the pattern, so let's take off the existing seat cover and disassemble it to make the pattern.

Remove staples with screwdriver (flat head) to pry up, and pliers to pull out.


Then peel the cover off the stock foam. We want to be somewhat careful here so we don't pull up pieces of the stock foam with the cover, or else we will have a lumpy foam base.  I say "somewhat" because we will be cutting out a good portion of the center to install the gel insert.


OK, so let's disassemble....


Now I've learned (the hard way) that the collar, should not be cut to size right away, or else you won't have enough to stretch over the pan to staple.  just leave a lot of room on that for that purpose because you can trim that up at the end.

So I cut out the pieces to my pattern. (don't forget the seam allowances.)  It's best  also to fold the pieces in half so the left and right side match equally. Then I did the embroidery.  So Far So good.  I also wanted some strength for the seat, so I spray glued two pieces together.


Well let's see how the seat will come along...

Let's mark it off...


We'll need to cut down the ProPad


(Yes, I signed it LOL)

Okay then trace it onto the seat foam and mark off the blocking.


So then i was following that tute and marked off my cutting knife for 1/2"


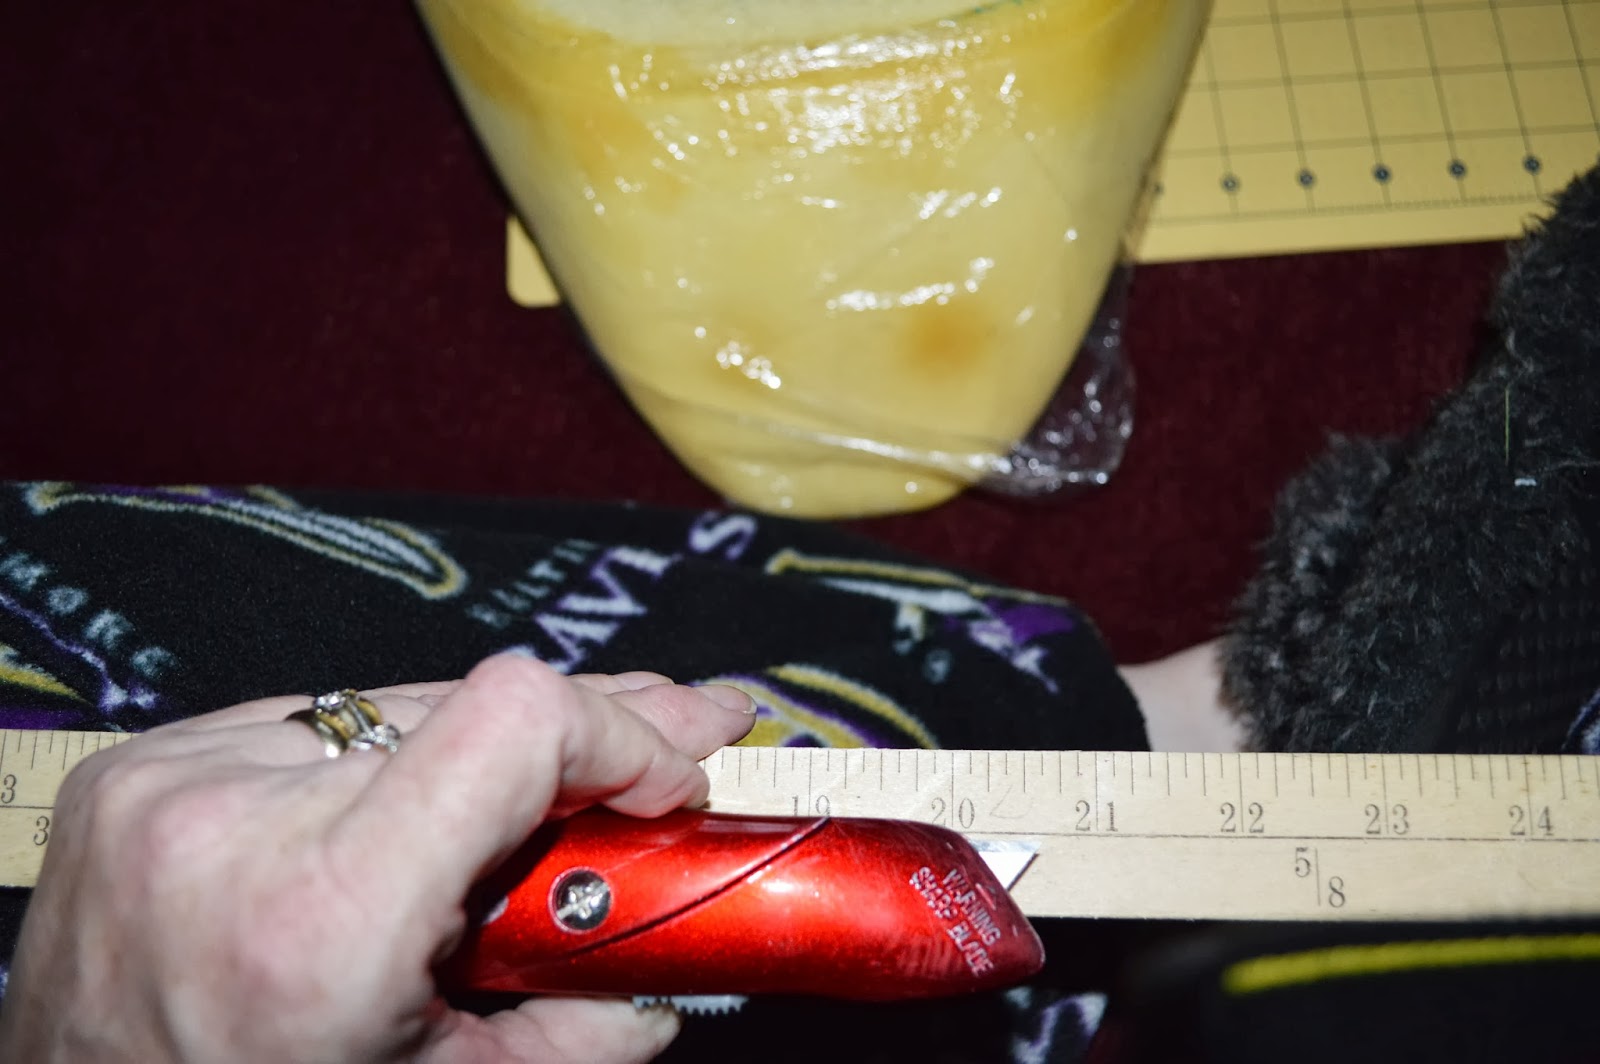
Started cutting the blocks out - not quite as e-z as you might think this might be. then peeled out the foam and it was coming out a little choppy, since i was unable to find a straight edge razor to cut underneath the blocks.


SO-o-o-o-o  I decided to use DH's Dremel.  This, too wasn't as e-z as you might think, however did a much better job, albeit QUITE messy. It is best to have it set on a very fast setting.


Made additional adjustments but this is what we have.  This should be comfy.

a fellow furyan on the Forum, said the best foam to cover it with was memory foam, so that's what we did.  We had purchased a sheet from Walmart for $14.


So, now we had to sew together the seat. Gee I hope this comes out.  Here we go... Since it's leather ( okay this is faux leather, but same principles apply when sewing ) you need to clip it instead of pin it, 


Now we have the major part of the seat done.  There are two "tongues" on the front and rear - I assembled those last, no pix.


I'm excited that this is working out pretty well.

Now let's see about getting this baby on the seat/pan. Will it fit????


Well, it fit, however I had to add those extra floppy pieces to give enough material so that I could staple to the pan.  However, the way I sewed those pieces on wasn't the 100% correct way that I wanted, (long story) so, the end result was that I was not really going to be able to glue the cover to the foam on the seat, the cover was too temperamental to get on... so while the end result was less than perfect, I know for next time, I can always re-make a cover any time I want, and i sort of think it has some charm.  (or am I trying to convince myself???)


I must say it is mostly right on centered, appropriate looking, stunning colors. Now let's get it on the bike and see....

Taking the seat off, was allen wrenches.  I had a set that I've had in my bikes for years, so why wouldn't I think they were Metrics?  So I just go and find the one that seems to fit the head.  Got one side off, and then oops stripped the 2nd side.  Now what???  Well, hubby came home in time and informed me that i was merely using the wrong size allen wrench.  He fixed me up, got me outta this jam, and I learned a few basic things.  So i got the seat off...


Installed my new one and let's have a look-see...


Love the color....


Posted a pic on the forum, and the guys told me gotta lose those reflectors.  Now they are really bothering me, so first up today will get those babies off!  (Hair dryer, Dental Floss, and Goo Gone)


Have a tank bib pattern cut out along with a design, thinking about a rear fender bib, and now the real nice Saddlemen fork bag (BLACK) that had to be put on the front, (now I'm riding solo seat) doesn't go, and I will need to make a matching one out of this same material as the seat.  I think I will need to make that before the bibs.  My only other choice is to add some of the material to the Saddlemen bag.  I just thought of that now, so I'll take a look in a bit to see if that will work out.  It can be a two tone fork bag.

Well I took a test ride yesterday, cruised for over an hour, and when I got off her I at least could walk! So the seat has been improved.  My first Mod.  A Success Story.


Cheers!

JDol