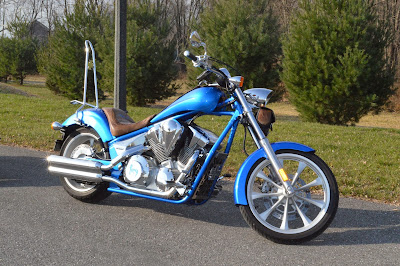
So... How in the world do I start this? Well, let's get it into Photoshop, and get some outlines going, so we can have our base to do our digitizing drawing. I guess that's the first thing...
OK, so now import that into DRAWings digitizing software...
And... Let the games begin! :)
We need to plan out our drawing to some extent, what will be drawn first, etc. You need to group like items together, but not all items are "like items" because you will need to have different stitching techniques for them, to make the design appropriate, so i ran into this a few times, where I grouped too many items together, and had to delete and go back and group smaller sets, so as to get the proper stitching for them. Plus color changes, jumps, and such.
I wouldn't have as much experience if not for the forum folk challenging/inspiring me to draw things, and stitch things, special requests and such. :) I called upon one design i used which started with tires, so that's where i decided to begin.
Now the way you freehand draw is that you make drawing points, and then you bend the lines at a later time, so the designs will have sharp points until I round them all out, which i will probably just do all at once at the end. So here's step 1& 2: Got the front tire and the front wheel.
Then the back tire, done in two parts.
Then on to the engine and take a preview of what I have so far...
Lookin' good.... Well, That was at least 4-5 hours all told up to now, I needed a break, more later and tomorrow. I'm determined to see how I can make out on this.
THE NEXT DAY...
Well gave it a go since early this morning, but was so focused and the camera was in the sewing studio, that i forgot to take progress, pictures, so this was the next break I took. another several hours in. I gave it an early start, being perplexed at first with where to begin, since there was so much left to do. Once i got started, though, i got on a roll, and just kept going. So we're not bad here, I think we've got all the drawing done at this point.
So now begins the rounding of all the lines... First the tire
Now match the rim to the tire
Okay we pretty much have the bike done at this point.
Let's straighten her out
And add her name...
Now the next step will be to tweak the design for any last minute finishing touches and then stitch it out. I can hardly wait, but it will have to be tomorrow, i'll need a fresh look at it.
"TOMORROW"
Well, Tweaked it a bit, and went and stitched it...
I LOVE IT!!!!!!
Here's the Comparison:
I am so proud of myself!
My very BlueJ captured in an embroidered Tee!
I will wear this shirt with extreme pride! Yippee for me :)
I think all told the designing to final stitching completion was around 15-16 hours.
Cheers!
JDol


